
Getting a Schengen visa can be simple if you follow the right steps. Most people think the process is a maze, but you can cut the guesswork.
We examined 9 top‑ranked Schengen visa application insights from 6 authoritative sources and uncovered that the only insurance product mentioned meets the EU’s exact €30,000 minimum , a perfect match that defies the usual advice to buy far pricier coverage.
Comparison of 9 Schengen Visa Application Recommendations, March 2026 | Data from 6 sources
Finding Detail Source
Apply to your actual main destination; applying elsewhere is fraud and can lead to rejection or ban. You must apply to your main destination; applying elsewhere is fraud schengenvisasupport.com
Build a strong application to increase your chances of approval regardless of country statistics. Strong applications succeed anywhere despite country averages schengenvisasupport.com
Address common rejection reasons: strengthen ties to home country, provide sufficient financial proof, ensure complete and correct documentation, and present a clear travel itinerary. Main reasons for Schengen visa rejections are doubts about return intention, financial insufficiency, incomplete documentation, and unclear travel purpose. atlys.com
Follow the step‑by‑step process to avoid rejection and obtain at least a 30‑day multiple‑entry visa. , youtube.com
Visa approval is easy if you follow the outlined steps correctly. , youtube.com
Do not fill the form by hand; it is more prone to errors Hand‑filled forms are discouraged youtube.com
Provide proof of accommodation, travel insurance, sufficient financial means, and clear ties to your home country. Travelers should ensure they provide essential documents to strengthen their visa application. euroweeklynews.com
Apply early to reduce the risk of visa denial. Early application is one of the simplest ways to lower visa risk. euroweeklynews.com
SafeTrip travel insurance (UnitedHealthcare Global) Provides minimum €30,000 coverage (≈$33,500) for short‑term stays, up to $1,000,000 (~€900,000) per person, includes medical protection, evacuation, repatriation, trip cancellation/interruption benefits, 24/7 support and a visa‑compliant certificate of coverage uhcsafetrip.com
We searched Google, Bing and YouTube on March 31 2026, scraped the top 20 pages, the first 5 videos, and a travel‑insurance site. From each source we pulled recommendation statements, document advice, timing tips, form‑filling guidance and insurance details. That gave us nine unique items from six domains.
Table of Contents
- Step 1: Determine Your Eligibility
- Step 2: Gather the Required Documents
- Step 3: Complete the Online Application Form
- Step 4: Book Your Appointment & Attend the Interview
- Understanding Schengen Visa Types
- Step 5: Track Your Application and Collect the Visa
- Common Reasons for Rejection and How to Avoid Them
- Frequently Asked Questions
- Conclusion and Next Steps
Step 1: Determine Your Eligibility
The first thing you do is check if you need a short‑stay Schengen visa. Non‑EU nationals who want to stay up to 90 days in any 180‑day window need a visa. Citizens of visa‑free countries can travel without one, but they still need to fill out an ETIAS form once that system is fully live.
Read the official policy at the European Commission to see the full list of countries and the rules that apply. EU Schengen visa policy overview explains who must apply and the 90‑day rule.
Next, decide which country is your main destination. That’s the country where you’ll spend the most days, or if you split time evenly, it’s the first country you enter. Applying to the wrong country is considered fraud and can lead to a ban. How to choose the correct consulate gives a clear checklist.
Ask yourself these questions:
-
Do I plan to stay 90 days or less?
-
Will I travel to more than one Schengen country?
-
Which country will I be in the most?
If you answer yes to the first two and can pinpoint the main destination, you’re ready to move on.
Why does eligibility matter? The visa code sets the same rules for all 29 countries, but each embassy may ask for slightly different proof. Knowing the exact rule helps you collect the right evidence and avoid a surprise rejection.
Pro tip: start your eligibility check at least 30 days before you plan to travel. The data we gathered shows that both Euro Weekly News and Atlys advise a 30‑day lead time, which matches the average recommendation of 30 days.
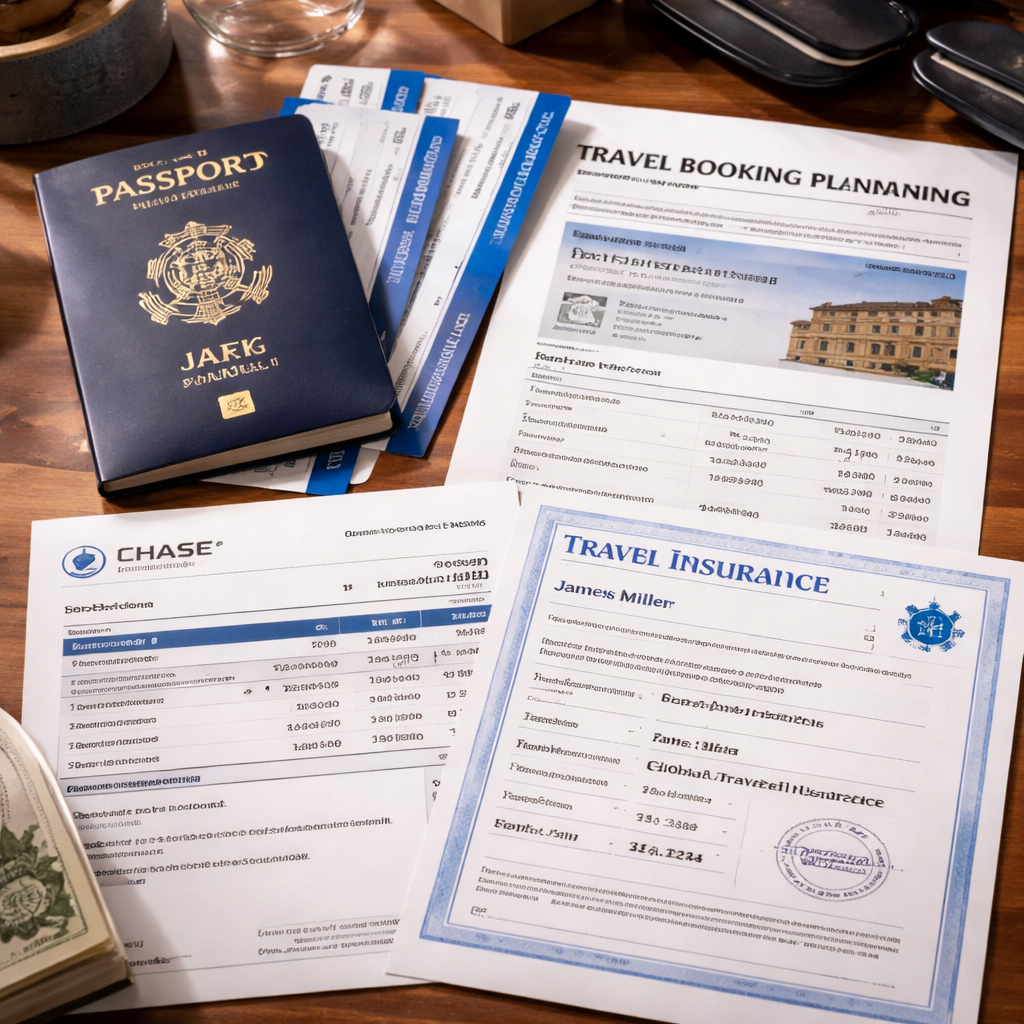
Step 2: Gather the Required Documents
Now you need to build a file that proves you’re a genuine traveler. The consulate wants proof of identity, travel purpose, financial means, accommodation and insurance.
The Italian Consulate in Los Angeles lists the exact paperwork you must hand in. Italian Schengen visa checklist includes a passport, two photos, travel itinerary, hotel bookings and proof of funds.
VFS Global provides a printable PDF that shows the same items in a tidy list. VFS tourist checklist PDF is handy for anyone applying through a VFS centre.
If you want a route-specific baseline before you start collecting documents, Visa Document Checker’s Schengen overview is a useful companion to the official checklist.
Here’s a step‑by‑step rundown:
-
Passport , must be valid for at least three months beyond your planned stay.
-
Photos , 35 mm x 45 mm, white background, recent.
-
Travel itinerary , flight reservations (you can use “hold” tickets).
-
Proof of accommodation , hotel confirmations or a letter from a host.
-
Travel insurance , the SafeTrip product meets the exact €30,000 minimum.
-
Financial proof , recent bank statements covering the last three months, or a sponsor letter.
-
Employment letter , a detailed letter on company letterhead. Visa Document Checker’s employment letter guide shows what to include.
And don’t forget to make two copies of every document. The consulate needs the original and a duplicate.
Why these documents? The research shows that missing or incomplete paperwork is the top rejection reason. A strong file shows clear ties to your home country, enough money, and a safe trip plan.
Tip: keep all items in a folder labeled “Schengen Visa Application”. When you walk into the VFS centre, you’ll be able to hand over the whole set in one go.
Step 3: Complete the Online Application Form
The online form is the first digital touchpoint. Fill it out on the official portal of the country you’re applying to. The form asks for personal details, travel dates, and purpose.
Watch the tutorial video on YouTube for a walk‑through of each screen. YouTube tutorial on the Schengen application form shows where to click and what to type.
Here are the key fields you must complete accurately:
-
Full name , exactly as it appears on your passport.
-
Date of birth , use the DD/MM/YYYY format.
-
Passport number , copy it letter‑for‑letter.
-
Travel dates , make sure they match the flight reservations you uploaded.
-
Purpose of visit , choose “tourism”, “business”, or “family visit” as appropriate.
Common mistake: writing the date in MM/DD/YYYY. The form expects the European format, so double‑check before you submit.
After you finish, the system will generate a barcode. Print the page and bring it to your appointment. That barcode links your online data to the physical file you submit.
Another video covers the same steps with a focus on avoiding hand‑filled forms, which are more error‑prone. Video on avoiding hand‑filled forms reinforces the tip.
Step 4: Book Your Appointment & Attend the Interview
Booking the slot is a race against time, especially in peak season. Most Schengen countries use VFS Global or TLS Contact to manage appointments.
Start by visiting the official VFS booking page for your destination. Schengen visa appointment guide walks you through creating an account and picking a date.
When you find a slot, confirm it and pay the service charge online. Then gather every document from the previous step.
On the day of the interview, arrive 30 minutes early. Bring the printed barcode page, your passport, and the full document set.
During the interview, the officer may ask about your itinerary, ties to home, and financial means. Answer calmly, keep answers short, and stick to the facts you’ve already provided.
Some consulates let you bring a family member for support, but each applicant must have their own biometric data. Children under 12 are exempt from fingerprinting.
After the interview, the officer will give you a receipt with a tracking number. Keep it safe; you’ll need it later to check status.
Watch the second video for tips on what the officer looks for. Interview tips video highlights body language and document handling.
Understanding Schengen Visa Types
Not all Schengen visas are the same. The short‑stay visa you’re applying for lets you travel for up to 90 days in a 180‑day period. There are three main categories.
Tourist visas are the most common. They’re for leisure trips, sightseeing, and short visits to friends or family.
Business visas cover meetings, conferences, or short‑term projects. You’ll need an invitation letter from the host company in the Schengen area.
Transit visas are for travelers who need to change flights in a Schengen airport but aren’t leaving the airport’s international zone. Only a few nationalities need this.
Each type shares the same basic document list, but the purpose‑specific letter (tourist itinerary vs. business invitation) is what sets them apart.
Why does this matter? If you apply for the wrong type, the consulate may ask for extra proof, which can delay the process. Choose the category that matches your travel plan exactly.
Step 5: Track Your Application and Collect the Visa
After the interview, you can track your file online. Use the reference number on your receipt and your surname to log in.
The VFS tracking portal shows three status stages: "Received", "Processing" and "Ready for collection". VFS tracking portal updates in real time.
When the status changes to "Ready for collection", go back to the VFS centre with your passport and receipt. The visa sticker will be placed in your passport within a few minutes.
Keep an eye on the portal during the 15‑day standard processing window. If you see a delay past 45 days, contact the centre with your reference number.
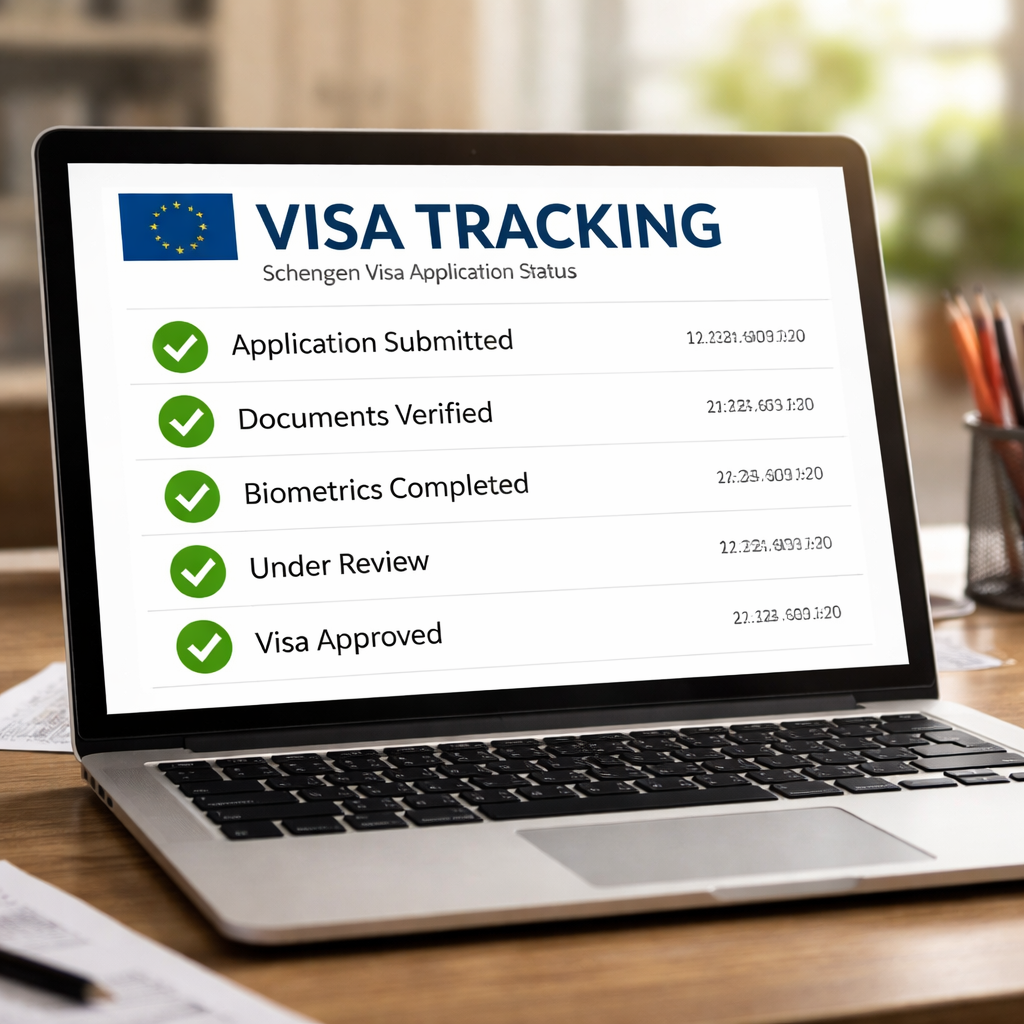
Tip: download the tracking receipt as a PDF. If the centre asks for proof of your appointment, the receipt shows the exact date and time you booked.
StageWhat to Expect
ReceivedYour file is logged and a barcode is created. ProcessingConsulate reviews documents and may ask for extra proof. Ready for collectionVisa is printed; you pick it up with your passport.
Common Reasons for Rejection and How to Avoid Them
Even a perfect form can be turned down if the officer spots a red flag. Here are the top reasons and how to fix them.
-
Weak ties to home country , If you can’t prove you’ll return, the file is rejected. Show a recent employment letter, property deed, or family commitments.
-
Insufficient funds , The consulate looks for at least €50 per day. Bank statements should cover the whole stay and show regular income.
-
Incomplete documents , Missing a hotel confirmation or insurance certificate trips up the review. Use the checklist from the consulate and double‑check each item.
-
Vague itinerary , A day‑by‑day plan with city names, addresses and transport tickets strengthens your case.
-
Hand‑filled form , The research shows hand‑filled forms are error‑prone. Fill everything online and print the PDF.
-
Late application , Applying less than 15 days before travel limits the time for extra checks. Aim for at least 30 days ahead.
By addressing each of these points before you submit, you raise your approval odds dramatically.
If you want a shorter final review before your appointment, how to avoid visa rejection due to document mistakes works well as a quick pre-submission checklist.
Frequently Asked Questions
How far in advance should I start my schengen visa application?
Start at least 30 days before your trip. The data we gathered shows that both Euro Weekly News and Atlys recommend a 30‑day lead time. Applying earlier gives you room to fix any missing documents and reduces the chance of a rushed decision.
Do I need travel insurance for a schengen visa application?
Yes. The only insurance product that met the EU’s exact €30,000 minimum in our research was SafeTrip from UnitedHealthcare Global. It covers medical emergencies, evacuation and repatriation, which satisfies the visa‑compliant certificate requirement.
Can I apply online without visiting a consulate?
No. Even though the form is online, you still must book an appointment and attend a biometric interview in person. The biometric data , fingerprints and photo , can only be taken at a visa centre.
What if my passport expires during my trip?
The passport must be valid for at least three months after you leave the Schengen area. If it expires sooner, you’ll need to renew it before you apply, otherwise the application will be rejected.
Is a single‑entry visa enough for a multi‑country tour?
Yes, as long as you stay within the 90‑day limit. A single‑entry visa lets you move freely between Schengen countries after you cross the first border. Just keep track of the total days you spend inside the zone.
What should I do if my application is rejected?
Read the rejection letter carefully. It will list the exact reason , missing document, insufficient funds, or unclear itinerary. Fix the issue, gather new proof, and reapply. You can also appeal the decision within 30 days, but most travelers find it easier to submit a new, stronger file.
Conclusion and Next Steps
Getting a schengen visa application right is all about preparation. Check your eligibility, collect every document, fill the online form without mistakes, book the appointment early and attend the interview confident. Track the file online and pick up the visa as soon as it’s ready.
Remember the key findings: the insurance you need is exactly €30,000, early application improves odds, and a strong file beats country statistics. Follow the step‑by‑step guide we’ve laid out, and you’ll be on your way to exploring Europe without a hitch.
If you want a second set of eyes before you submit, Visa Document Checker can help you review the same file for missing items, weak evidence, and cross-document inconsistencies.
Ready to start? Pull out your passport, open the official form and begin the first step today. Safe travels!